Showing posts with label how-to guides. Show all posts

Friday, 22 June 2012

Fright-Day Foods: Purple Glitter Skull Cake


Last month, for a friend's birthday, I decided to take the opportunity to use a new skull-shaped pan I had and make him a spooky cake! Since I know some of you like to bake, I thought I'd share the incredibly simple decoration details with you here. It's just a vanilla sponge cake (I made other bits of the cake too, but they weren't horror-esque), so I haven't included a recipe below, only decoration instructions.

This post is part of Fright-day Foods!


How-to guide after the cut below↓

Tuesday, 14 February 2012

Vampire's Day Soiree- Part 2: Valentine Vampire Cake

In honour of today being February 14th, HSL is taking part in the Vampire's Day Soiree, being run by Holly at Holly's Horrorland! So, instead of cheesy, sickly sweet, love-themed posts, you'll be getting some amazing, blood-drenched, vampire posts. Okay, so the posts here will probably be just as cheesy, but I'm sure some of the other participants will be able to give you something a little more sophisticated and refined ;) You'll find a list of the other participants and links to their blogs at the end of each Vampire's Day post here. That done with, on with part 2 of the sanguinary fun!

Part 2: Vampire-themed Cake 


How to make this bloody cake!

You will need:


- 1 large rectangular sponge cake
- 2 small rectangular sponge cakes (I made mine, but you can always buy them if you want to)
- Fondant icing or marzipan
- Red and black food colouring
- Chocolate hearts
- Designer icing in red, or chocolate icing
- Sugar skull and spiderweb decorations
- Pastry brush / paintbrush


Cover the large cake with fondant icing to form the base


Using the red food colouring, paint the entire base with the pastry brush. Then apply streaks of black to create the effect above. The colouring will make the cake shiny while wet, but it is more matt when completely dry.


Cut the two smaller cakes into coffin-shaped cakes and stick them next to each other onto the base using the chocolate icing. Paint the top with more red colouring.


Using the fondant icing, make the shapes for the vampire, coffin edging, and lips. Paint them as desired and add some chocolate hearts in the empty side of the coffin. Don't worry if your vampire looks like a cross between a penguin and Ernest the Vampire. Mine did too! :D 


Add some fondant teeth and bloody fangs to the mouth and then add the chocolate icing heart, topped with white chocolate decorations and sugar skulls / spiderweb decorations wherever you want them. 


And you're done! 

I don't have a photo of it after it dried, but I think the gross, oozy, shiny blood look kind of works with this theme ;)


Other  Vampire's Day Soiree Participants:

Friday, 13 January 2012

Friday 13th: Jason & His Gingerbread Victims

As you all know by now, today is Friday 13th, and in addition to being a notoriously unlucky day for the superstitious, it is also Fright-day Foods time here on HSL! Today's Creepy "cooking" is:

Jason Voorhees & His Gingerbread Victims


Ridiculously easy how-to guide after the bloody machete cut below↓

Friday, 9 September 2011

Fright-day Foods: Filo Blood Fountains


On the surface, this isn't strictly a horror-inspired dish, but when you pair it with other spooky foods and a scary setting, it really works well. It's especially easy if you make the Blood Shakes we featured previously too, as it has the same strawberry sanguine sauce. You can find the sauce guide here: Blood Shakes in Syringes. Alternatively, you can just make the simple strawberry only version from the following guide.


Recipe and how-to guide after the cut below↓

Friday, 26 August 2011

Fright-day Foods: White Chocolate & Strawberry Ghosts


This week's frightening foods come from the great beyond and onto your plate. White Chocolate & Strawberry Ghosts! They are super easy to make, really tasty and they look gorgeous too.

Ingredients:
Strawberries
White Chocolate
Silver Spoon Black Designer Icing

You will also need cocktail sticks.

Method:


1. Fill a bowl with hot water. Take another bowl of a similar size and put the white chocolate, broken into squares, in it. Place the second bowl on top of the first, so that the heat from the water can melt the chocolate. Make sure none of the water spills over into the melting cubes.


2. Whilst the chocolate is melting, you can prepare the strawberries. First, chop off the tops.


3. Turn the strawberries upside down and skewer them with the cocktail sticks. This gives you the base for your ghosts.


 4. Cover a tray or plate with grease-proof paper and place the upside down, skewered strawberries on it.


5. Spoon the white chocolate over the strawberries, making sure you use enough to cover them. The chocolate will naturally drip into the ghost shapes. Put in the fridge to set.


6. When the chocolate is fully set, pipe the icing onto the ghosts to make the faces, and you're done!


Sunday, 14 August 2011

Art & How-to Guides: Jim McGee's Monster Drawings

Y is for Ygor
Originally hailing from the UK and now residing in Tokyo, Jim McGee draws familiar (and some not so familiar) faces from popular culture, in his own distinctive style. In 2010 he created a pictorial A-Z of monsters, featuring a plethora of characters from horror and science fiction, such as Vampira, Godzilla, Sadako, Ygor and  many more.

N is for Neko Musume and Nurikabe
V is for Vampira
Though the drawings don't always look like exact copies of the characters/actors, they aren't necessarily supposed to and it's obvious who they are. Every monster personality is represented wonderfully well, often with a dash of humor, which will make the drawings very endearing to fans of the genre. Another nice touch is the cameos and background extras that often crop up in McGee's work. For example, The Monster, The Wolfman and Una O'Connor are all in the background of the Ygor portrait.

G is for Godzilla
In addition to the monster art, there are also a multitude of tutorial and speed drawing videos on McGee's YouTube channel. It's not all spooky, with subjects ranging from Zombina (of Zombina and the Skeletones) to Tinkerbell, Frankenstein's Monster to Totoro, but it is certainly worth a look as he updates often, and is willing to take requests as well!

A still from 'How to Draw Zombina. Horror High School. Prof Fearstone'
Each video drawing is completed in 10 minutes, with extra characters/details being added if there's spare time and space. The above still features Zombina, with Professor Fearstone (a character McGee plays in 'Horror High School') coming to life in the background. Video tutorials on how to draw Zombina, Beetlejuice and Frankenstein's Monster are included after the cut below.

To see more of Jim McGee's work, you can visit the following sites:
Jim's very own A-Z of "Movie Monsters" on Facebook

Thank you to Jim for permission to use the images!

Friday, 12 August 2011

Fright-day Foods: Blood Shakes in Syringes


The inspiration for this came from a recipe for 'Dracula's Blood Shakes' from Tesco, which was sent to me by Kei from Unfortunately Oh!. It's really simple and quick to make and can contain almost any kind of fruit and non-carbonated drink you like. They're perfect for a little extra ambiance on any spooky table!


This post is for today's Fright-day Foods...


Ingredients and how-to guide after the cut below↓:


Tuesday, 2 August 2011

Food and Drink & How-to Guides: Skull Eyes Cake

Skull Eyes Cake by Lilia Tombs
If you ever find yourself having a zombie tea party, but don't know what kind of cake to serve, this Skull Eyes Cake might just be what you need. It would probably go down quite well with humans at Halloween or a spooky birthday party too!

Skull Eyes Cake by Lilia Tombs


Recipe and how-to guide after the cut below↓

Saturday, 30 July 2011

Fashion & How-to Guides: Spooky Nail Art


My friend and I were bored last week, so I decided to do some spooky nail art. It was fun and so I thought I'd make it into a how-to guide, just in case you too find yourself with nothing better to do! 


Guide & close-ups of each nail are after the cut below↓

Wednesday, 6 April 2011

Toys, Dolls & How-To Guides: Creepy Little Yarn Dolls

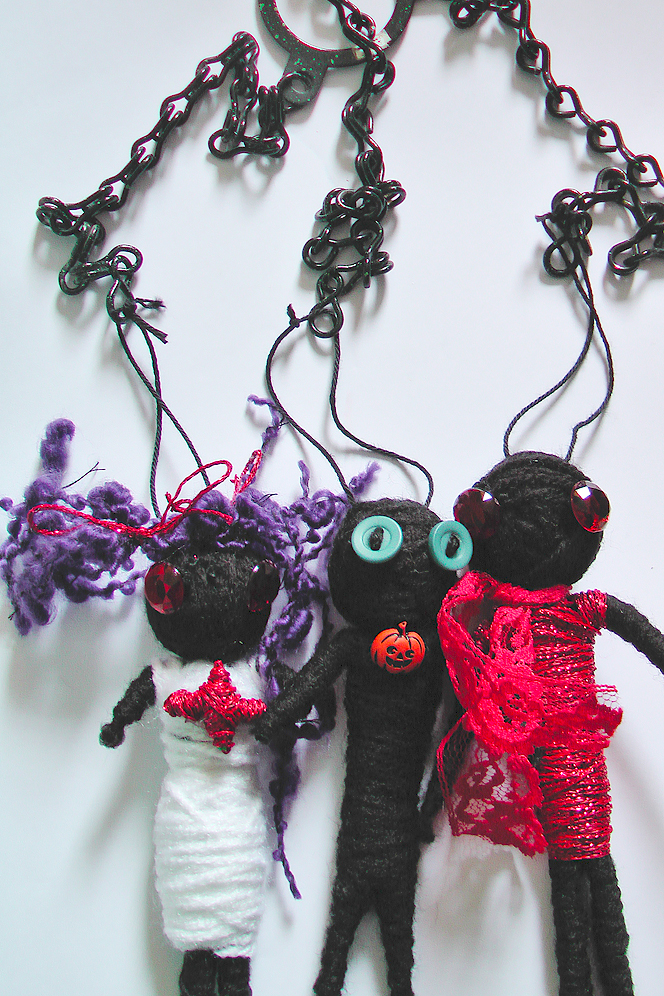
My yarn dolls
Kei of Unfortunately Oh! recently sent me a link to a tutorial, from Dollar Store Crafts, on how to make yarn "voodoo dolls". Since I collect voodoo dolls & toys related to them, I thought it would be great fun to try making some of my own voodoo doll toys and to share a how-to guide here on HSL! Mine came out looking rather different to the DSC one, but that's the great thing about these - they're so customisable! I also chose to make a decoration from mine, using an old light fitting that I had, but you could adapt them to go on necklaces, keychains, or anything else that takes your fancy too.

You will need:

  • Yarn or string (colour of your choice)
  • Needle and thread (same colour as yarn)
  • Thin, bendable wire (colour does not matter as it will be covered)
  • Sponge, cotton wool balls or foam (for the head)
  • Scissors
  • Glue (either hot glue or PVA glue, not super glue, as some super glue contains chemicals that melt yarn fibres. Although it fuses it together really well, it smokes and, if you use too much, it can cause a hole)
  • Buttons & decorations
  • Something to attach your doll(s) to *Optional*
Tutorial after the cut below↓:

Tuesday, 29 March 2011

How-To Guides: Pumpkin Parcels


Today brings another find from an article in a magazine that was kindly given to me. It was in the October 2010 issue of Your Home, which had a section about Halloween crafts. None of them are on the website, so I thought I'd make them and share the guides here.

First up - Pumpkin Parcels! I used orange tissue paper instead of crepe paper and green tissue paper & cellotape instead of green florists tape, but they are essentially the same.


They're really easy to do and, depending on how many you make, only take between 5 minutes and half an hour to produce. You could put little presents or sweets or anything else you want inside and draw jack o' lantern faces on them to make them more individual, so they're also pretty versatile.

My pumkin parcels


You will need:
  • Cellotape / double-sided tape
  • Scissors
  • Green tissue paper (or green florists tape)
  • Orange tissue or crepe paper
  • A pen
  • Something to fill the parcel with
  • A dinner plate (to draw around, not pictured)
More pictures and a step by step how-to guide after the cut below↓

Saturday, 12 February 2011

Events: Horror/Creepy Tea Parties for Charity


'Terrifying Tea Party!' by Michelle Souliere

Okay, first of all I need to point out that if you've somehow found your way to this entry looking for something to do with politics, you should leave now, as this is absolutely not what you're looking for. However, if you're here looking for a way to host a fantastic and horror-themed tea party, whilst raising money for a worthy cause, then this is the place for you!

That out of the way, I should probably preface this by telling you that in addition to loving all things scary and strange, I also adore animals. So for that reason, I'm posting this entry. Between April 2nd and May 2nd 2011, UK animal charity, The Blue Cross, are holding fundraising tea party events across the country and are encouraging people to sign up and hold tea parties of their own. So why not make yours have a horror/zombie/Halloween etc. theme, and have some fun whilst raising money? If you're not in the UK, or would prefer to support a different cause, then all you have to do is send/give the money you raise to a charity or organisation that you would like to help.


Some theme ideas for your creepy tea party might include:

  • Horror - have an event with movie screenings, horror music, creepy horror villain-inspired food etc. You can make the theme horror in general, or pick a specific movie/series/book etc. to base it on. You could even get your guests to dress up as their favourite characters!
Skeleton Cake made by me
  • Halloween - use any Halloween decorations to make your venue look like it was October 31st all over again! Use cupcake holders with spooky designs,  creepy cake decorations, tableclothes with ghosts/bats/pumpkins printed on and eerie theme music to set the scene.
  • Zombies - get your gory brain props and special effects make-up out and transform yourself, your family and your friends into undead ghouls! if your event is indoors, you could show zombie movies or if it's outdoors, you could even organise a mini-zombie lurch to go with it!
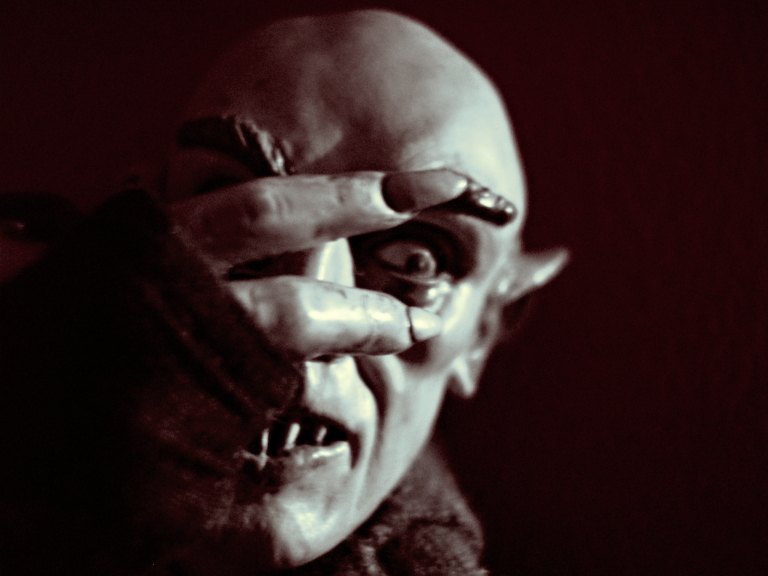
  • Nosferatu
    Vampires - this will vary depending on what kind of vampires you like; zombie-esque ones from traditional mythology, Nosferatu-esque vampires who aren't like zombies, but aren't quite like modern takes on them, gothic horror vampires like Bela Lugosi in Dracula or Christopher Lee in the early Hammer Dracula movies, "sexy" vampires etc. etc. You'll need to change your decor accordingly, but the essential thing about this is, BLOOD! (Or at least something that looks like it) All vampires want that ;)
    'Future Mad Scientists of America' by
    John "Jay" Glenn
  • Victorian Curiosities / Mad Scientist's Lab - these have been put together because for curiosities and labs you will need specimens in jars, strange looking items, weird and wonderful medical paraphernalia and so on. Obviously for the curiosities theme, it's essential that your table and decor choices are in-keeping with the Victorian era, just as the lab has to have a vaguely inventor/medical experiment feel, but there are actually quite a few variations on each. For example, Victorian circus or Steampunk lab. 

  • Creepy Cute - if you like your bloody, padded room-dwelling pyschos mixed with fluffy teddies, polka dots, stripes and large eyes, then creepy cute is a perfect for you! Examples of this style are the paintings/drawings of Junko Mizuno and Mark Ryden, the games 'Plants vs. Zombies', 'MediEvil' and 'Grim Fandango' and 'American McGee's Alice', the series/game 'Gregory Horror Show', Living Dead Dolls and most of Tim Burton's more popular movies. Think pretty pink cakes with gory eyeball decorations, teddy bears with disturbing smiles, bright candies and lollipops scattered in a graveyard, friendly monsters...anything of that kind.

There are, of course, many other theme ideas and there's no reason why you couldn't have a combination tea party, these were just for inspiration. With all of the themes, use a tea, such as pomegranite and raspberry, with a red tinge and serve in horror/skeleton themed cups to bring the whole event together.


'Tea Party with guest Mauley the Zombie Doll' by Shain Erin

For tutorials, shopping and more ideas, see the blog sections below. We'll be updating these regularly, so keep checking! Alternatively, if there's something you really want to see, but we haven't covered it yet, ask us for a tutorial and we'll get on it!

Related Posts Plugin for WordPress, Blogger...